Mostrando entradas con la etiqueta cartridge. Mostrar todas las entradas

viernes, 30 de mayo de 2014

How to refill the HP 56 black ink cartridge

The HP 56 black ink cartridge has a very high page yield due to the amount of ink the sponge inside them can soak up. If you buy this cartridge directly from the manufacturer, you can print up to 520 pages with it.

After refilling it with approximately 17ml of ink, you can still print up to 400 pages. We recommend you refill this cartridge with pigmented ink, which will help the cartridge reach laser print quality. You will still get the same results after refilling it and a page yield close to the original one.

If you wish to learn more about ink types, please read the following post. Finally, we recommend you follow this procedure to the letter to avoid causing any harm to your cartridge.

If this procedure doesn’t work out for you, please contact us by leaving a comment in the section below this post.

This ink cartridge is compatible with the following printer models:

HP deskjet 5550, 5551 and 5552;HP portable deskjet 450cbi; HP photosmart 7150, 7350, 7550, 7660, 7760 and 7960; HP multifunction psc 2105, 2108, 2110, 2115, 2150 and 2210; and HP officejet 6111.

Instructions for refilling an HP 56 black ink cartridge:

Before we start, we recommend you have clean the contacts on the cartridge. However, this is necessary, not mandatory, especially because these ink cartridges have such great performance.

If you haven’t used these cartridges for a long time, we suggest you clean them first because there may be some dried ink on the print head, which is never good. If you wish to learn how to do this, then please read the following post.

After you’re done with the cleaning process which, again, is not mandatory, you may proceed to refill the cartridge. Please take into account we recommend you clean your cartridge after every three (3) refills.

Step #1:
First, put the cartridge on a surface you can spill some ink on. We don’t recommend you put it on any white material, since you won’t be able to remove the ink from it. On the contrary, we suggest you use dark or black materials, and that you place the cartridge on a flat surface that you can clean easily in case some ink lands on it.

Step #2:
Then, remove the label that has the number of the ink cartridge drawn on it. We always recommend you take this label off the cartridge; it is the one responsible for letting the necessary amount of air into the cartridge, which contributes to its performance and the print quality. Remove this label slowly to avoid damaging it.
place to put the ink
Step #3:
You may now inject the 17ml of ink very slowly into the cartridge. Please do this as slowly as possible to help the ink spread inside the cartridge and soak up the sponge located in it.

Step #4:
Now that you’ve refilled the ink cartridge, all you need to do is print a test sheet with it. We recommend you leave the cartridge in the printer from this moment on.

Unfortunately, something could still go wrong with this procedure, even if you’ve followed the steps in this post strictly. If this is your case, please contact us by leaving a comment in the section below this post, and we will help you out immediately.

As we were saying, we always recommend you print a test sheets after refilling an ink cartridge. If you wish to learn how to do this, then please visit the following post.

If your HP 94 black ink cartridge starts blinking when you put it back in the printer, then we recommend you read this other post that will teach you how to restore it. This post will work on this cartridge and many others.

If the cartridge continues to blink or have any other problems after refilling it, please apply the following procedure:

Remove the ink cartridge from the printer and clean the contacts on it with a wet napkin. You should also clean the contacts on the printer.
  • If you still can’t find a solution, turn the printer off for 10 minutes and disconnect the power cord.
  • You may plug this cable and put the ink cartridge back in the printer after the 10 minutes have passed.
  • If this doesn’t help either, then please contact us.

viernes, 16 de mayo de 2014

How to refill HP 15 black ink cartridges

HP 15 black ink cartridges have been used for a long time, especially during the first decade of the 2000’s. This was the best ink cartridge at the moment, and it’s still known for it’s high page yield and overall print quality.

These ink cartridges are compatible with the following printer models: HP deskjet 810, 812, 815, 825, 840, 841, 842, 843, 845, 920, 940, 950, 3810, 3816, 3820 and 3822 models;  HP officejet v30, v40 and v45 models;  HP PSC 500, ,720, 750, 760, 920 and 950 models; and the HP digital 310 photocopier.

These ink cartridges can be refilled very easily, so we consider them to be one of the best ink cartridges available in the market. These yield up to 500 printed pages, an amount only a few modern ink cartridges can surpass.

This cartridge’s internal structure is flawless: it has a paper sack that holds all the ink of the ink cartridge, and lacks the inner sponges that can cause us so many problems. The only reason this ink cartridge wouldn’t last for you a long time is if you leave them empty for a long time, or take too long to refill them. If this is your case, please read our posts called How to clean your ink cartridges and How to unclog ink cartridges in your own home.

You will only need a few tools to refill their ink cartridges, such as a syringe, some in, a flat surface and a black piece of cloth to clean up possible ink spills.

Procedure to refill HP 15 black ink cartridges:

Please place the ink cartridge on the piece of cloth over the flat, easy-to-clean surface to avoid making a mess, or cleaning them rather easily.

Step #1:
Put your HP 15 black ink cartridge with the print head facing upwards, as is shown in the following picture. If you want to learn more about print heads and how to take care of them, please read our post called “The best advice for taking care of print heads.”

If you look around the bottom of the ink cartridge, you’ll be able to find a small piece of plastic that seals a small, iron ball located in the bottom of the cartridge. This is where we’ll refill the ink cartridge. Please look at the next picture.
refill the ink cartridge hp 15
refill hp black
Please be very careful when removing this particular plug to avoid pushing the iron ball inside the ink cartridge. If you don’t have a replacement for this iron ball, please don’t push it in.

Step #2:
Pay a lot of attention to this particular step. There are two different ways of  injecting ink into your HP 15 black ink cartridge: one is pushing the iron ball into the cartridge, and the other is injecting the ink right next to it.

If you choose to go with the first method, you will need to buy a spare plug for this iron ball in a printer shop. If, on the contrary, you go with the second one, don’t push the needle in too hard in order to avoid damaging the iron ball or the silicone around it. We recommend you use the second procedure, since these spare plugs aren’t easily found.
hp 15 cartridge refill
hp 15 refill
Step #3:
Regardless of the refilling method you chose, please inject the ink very slowly just to keep your ink cartridge safe. Remember to only inject 10ml of ink into this cartridge, and to only use the tip of the syringe to refill the ink cartridge. Do not push the needle into the cartridge or you could puncture it and case a permanent ink spill.

Step #4:
After you’ve injected the entire amount of ink into the cartridge, remove the syringe. You can now inside the needle back in the cartridge, only this time it needs to completely filled with 10ml of air. Add this amount of air to your ink cartridge.

Step #5:
After all this process has been done and finished, please put the plug back in the printer. If you’ve pushed the iron ball in,use the spare one. If not, then use the one that came with the cartridge.

If you’ve chosen to inject the ink using the space right next to the small iron ball, please check there isn’t any ink leaking from this spot by putting the ink cartridge with the print head facing downward on a piece of cloth. If the print head releases more ink than usual, then take some of those 10ml of air out the ink cartridge. If it’s not releasing enough, then add some more ear.

Suggestions:
We recommend you print several test sheets after refilling your ink cartridges and installing them back in your printer. If you don0t know how to do this, then please read our post called How to print a test sheet on windows OS.

lunes, 28 de abril de 2014

How to replace Canon ink cartridges

We think it’s very important you know how to change the ink cartridges n your printer. This may take a bit of practice, but it’s something you need to be familiarized with.

Please follow these steps to replace the ink cartridges of a Canon Inkjet printer.

Instructions:

1. Choose an ink cartridge that’s compatible with your printer mode. Canon ink can be versatile, so you may have to choose between Black ink cartridges, Colored ones  or packs that include both colored and black ones.
the on/off button on a Canon printer
2. Turn your Canon printer on. The On/Off button can be found on the upper-right side. Now, open the printer’s lid.
a picture showing you how to open the printer’s lid
3. Get the lid open. This tutorial has been made for Canon printers that use two (2) ink cartridges, which cover about 92% of Canon printer models.

4. Wait a minute. The ink cartridge carriage will stop automatically.

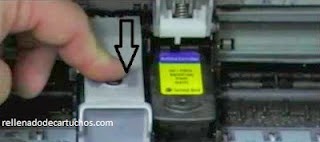
5. Put your hand behind the current ink cartridge and pull it towards you until it pops out. You can now choose to refill or discard it.
remove ink cartridge canon
this is how you should pull on the ink cartridge so it comes out
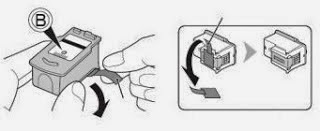
6. Remove the ribbon on the new ink cartridge.
remove the protective connector on the cartridge
7. Put the new ink cartridge inside the printer. Make sure it’s been set in the right position.
again place the cartridge into the carriage
8. Push the carriage softly until it fits in its proper place. Some ink cartridges hae indicators that willlet you know if they’ve been placed properly.

9. Close the printer’s lid and print a test sheet to make sure everything’s working perfectly.
close the door giving access to the cartridges
If your printer needs to be restored in any way, we recommend you read these more global posts regarding Canon printers:

How to restore Canon printers
Error codes for modern Canon printers

If you have any questions, please contact us by leaving a comment in the section below this post. We’re here to help and will answer back shortly.

How to contact us

First of all, thank you for entering our blog and trying to solve your ink and toner cartridges with our help. Unfortunately, we’re lacking a direct contact form to help you solve any specific problem.

We’re very grateful you want to contact us, and thank you so much for trusting the information we’ve shared here.

The only way you can contact us at the moment is by posting comments on our posts: we read them on a daily basis and are happy to answer back. We’ve also found this is the most effective method for finding a solution to any problem, since it remains on this blog. Other readers may be inspired by the results and created a more effective solution.
This is the proper way of writing a comment on our blog posts.
coment
coment in en.rellenadodecartuchos

Things to keep in mind:

You must post your comments using a valid and verified profile or email account, as Blogger demands. In this way, you can receive a direct notification when your question has been answered. If you post an anonymous question, you won’t be able to receive one, so we recommend you follow Blogger’s instructions and use a valid account such as LiveJournal, Blogger, Wordpress and TypePAD.

Another way of being notified is by subscribing to the posts. Take into account you will get an email or profile notification each time a question or comment is added to the post you’re subscribed to. We suggest you choose this method until your question has been answered.

Subscribing to posts:

This is a very effective way of getting an answer from the editor of the post. We answer each and every comment because we think they’re more important than publishing a new entry on our blog, since they give us feedback from our readers and customers. In this way, we obtain more information can look for new solutions.

viernes, 29 de marzo de 2013

The real secret behind HP 122 ink cartridges (CH561HL)

It’s a known fact that these ink cartridges are the biggest scam in the market for many different reasons, especially its low 120 page yield. The ink cartridge itself warns you about this fact on the packaging, which is completely unfair for a product that costs more than $10.

This ink cartridge holds but 2ml of ink and yields up to 122 pages.

box cartridge hp 122
box with printer hp
Personally, I find this very unfair, but that’s not even the biggest problem here. The actual issue is the discrimination going on in Hewlett-Packard Development Company, L.P., with all the respect they deserve as an enterprise.
This picture portrays an HP Deskjet 1000 printer, a very popular model throughout Latin America. Another successful printer in the region is the HP 2050 - J510. As you can see, both models compatible with the HP 122 ink cartridge. HP continues to evolve every year, but it seems they’re focusing on their own personal profit coming, of course, from our pockets, not on improving their products or offering more to their clients.

I will now show you why I oppose this particular injustice that’s happening in front of us.
ink cartridge 122 in box
This is the ink cartridge we Latin Americans are used to seeing all over the market. You can clearly see it’s compatible with HP Deskjet 1000, 1050, 1055, 2000, 2050, 3000, 3050 and 3500A printer models, products sold throughout the region. We recommend you read our post that talks about why HP 122 ink cartridges become damaged so fast.

We’ll now show you the Hp 61 Black ink cartridge (CH561WA):
ink black 61 in box
hp ink 61 in box
Here we have the Hp 61 ink cartridge, which holds 4ml of ink, yields up 190 pages and is sold in the US exclusively. You may be surprised to learn this product is also compatible with HP Deskjet 1000, 1050, 1055, 2000, 2050, 3000, 3050, 3500A, 3051A, 3052A, 3054 and 3054A printer models.

You can try looking for this ink cartridge’s datasheet, but if you’re doing it from Latin America or countries such as Japan, India and China, the website will automatically kick you out: their sale is restricted in all of these regions.

Now, do you think it’s fair one ink cartridge holds twice as much ink as the other, but they cost the same? The only real difference between these two is the places they’re sold at.

Please keep in mind you must never try placing an HP 61 ink cartridge inside any printer that uses HP 1222 ones. The printer will not recognize the ink cartridge and send out an error message at once.

However, it doesn’t end with these two ink cartridges. Please allow us to introduce the HP 301 Black ink cartridge (CH561EE).

HP 301 Black ink cartridge

This ink cartridge is only sold in Europe and the United Kingdom. I already know what you’re thinking: is it compatible with HP Deskjet 1000 printers made in the USA? This ink cartridge also holds 4ml of ink and yields 190 pages, and costs the same as the ink cartridges we have here in Latin America.

In all honesty, knowing this is happening is very frustrating for me, since customers don’t really have anyone who stands up for them and this is a hard process to give and end to. It seems companies only want to earn money and make us feel like using their products is the best we can do. If you do the math, the cost of one page keeps increasing for us, who are supposed to be the poorest ones.

How is, then, that they don’t want us to refill our ink cartridges? We all know their raw materials don’t cost that much, so please don’t take advantage of us.

This, however, is just something I want to talk about, a claim I need to make and a single speck of sand in the sea of deception we’re currently living in.

sábado, 23 de marzo de 2013

The best advice for taking care of an ink cartridge

It all starts when we open up a new ink cartridge and try it out for the first time. Ideally, we’d stop using it before it ran out and always leave a bit of ink inside it. In this way, we could refill this cartridge and place it back in the printer with no problems.

If you follow these steps strictly, you won’t even have to clean your ink cartridges before refilling them. PEople who recycle or refill ink cartridges can notice right away that most people don’t know this, or choose to ignore it.

As a recycler, we’ve decided to save ourselves a bit of work and invest a large share of our time in in educating our clients, so they can take care of their ink cartridges and extend their lives. This save the client a lot of money and the recycler a bunch of work.

For reasons we’ve already explained, the client must understand printing on an empty ink cartridge could finish it.

We usually come across ink cartridges that have been stored for a long while, leaving the headprint unprotected. In this cases, the most important thing to do is clean them thoroughly, both inside and out, to check if all injectors are working properly and ink is flowing through them.

Another way of taking care of your injectors is to protect the print heads after the cartridge has been refilled. Applying a good technique will keep the injectors from clogging with dried ink before they’re placed in the printer. We’ll explain this later on this same article.

It is also important you use the printer constantly and avoid storing it away with the ink cartridges inside. Even when printer count with protection systems inside the print heads, they won’t keep them safe for long periods of time.

Even though these pieces of advice are trying to show you the best way of taking care of your ink cartridges, they don’t mean you can’t refill ink cartridges at all or save them for a while before using them.

These suggestions are focused on extending your ink cartridge’s working life, but there are also many ways of recovering them and using them to print once more. Keep reading here.

Advice for taking care of your ink cartridge’s electronic circuit

The electronic circuit is the one responsible for taking orders directly from the printer and translating them for the ink heads, which will start the printing process.

As the sole controller of the all ink heads, this circuit cannot be replaced or fixed once it’s burned out or damaged entirely, and the ink cartridge will stop working.

Most of the time, the circuit will stop working before the ink head; people usually find out this has happened one the printer doesn’t recognize they’ve just placed inside it.

Some advice for taking care of the electronic circuit:

To avoid messing with the circuit at all, remove and replace ink cartridges while your printer’s turned off.

By printer off in the traditional way, the ink cartridges will go back to resting position and we won’t able to take them out.

However, there’s a trick that can fix this. Once the printer reaches its changing position, we must unplug it to leave exactly in this spot. The information for this post was taken from this website.

Restoring codes for Epson L100, L220 and L1800 ink bottles

We stand in front of a new era in printers, a time for adapting to the evolution of printers and also for trying to get an original, built-in CISS in our printing devices.

It seems these rather original printers are around the corner, or is just Epson trying to get ahead of anyone who wants to take its place by selling built-in CISS printers? Well, guess what?
code reset
ink bottles epson code reset
 As usual, they win. They’ve set extremely high prices and are forced to sell the only thing that has earned them money their entire lives: ink cartridges. However, in this particular case, they won’t be selling ink cartridges, but only ink. This product is called bulk ink.

But how are they going to earn more money from this? It’s actually pretty simple. Ever ink bottle will have its own code, which you can insert when buying one of these articles directly and only from them.

Maybe you’re also interested in reading about eradicating ink pad end-of-life error messages on Epson L200 printers, as well as learning how to clean the print heads in an Epson L200 printer.

You can also find in our blog many helpful tutorial such as how to clean Epson L200 print heads thoroughly, just in case the former cleaning procedure didn’t work out for you; how to change the language on Epson L200 printers, and how to align headpritnts.

We’ve managed to find these codes by looking around and have tested them out already. So far, they’ve worked perfectly. The only thing you need to do with these Epson ink bottles is pour it into the Continous Ink System as you would in any other printer with CISS. You can start working with these codes shown ahead whenever you want.
epson code reset code
epson reset code reset
Here are the restoring codes for the following printers:

Restoring codes for Epson and L100 and L1200 printers:


ID for Black ink bottles:

EKA-3TF-A24-GETR
J3K-958-9J4-5DLN
GDU-T62-G5N-3GMJ
7UR-BVW-47F-MBLZ
GPC-XJQ-VT9-799R
6T2-YBZ-9WX-J42A
3BV-YV9-459-S2RC
2YB-CXS-T8D-KXDG
445 - 645 - 6UD - E7VQ
X52 - 4HD - UVR - ZYRC
YVJ - FAW - J92 - QUES
VYM - 8WZ - 5F2 - RMQ3
B3M - QUH - 5ZB - YE8Z
TW7 - 6UE - BN4 - L8MB
63C - 8CD - DDQ - 55DA
A6X - 4HV - DQ9 - X3BZ
38J - 7W3 - 7WF - AL2B
H7R - HJK - FFU - P6EM
VB5 - 3TW - TVE - 9PAP
JW6 - W7J - D3S - JFGE
Y56 - DUY - NVN - 9425
RC9 - NKD - RVP - 29Q3
CK8 - JPG - HCX - MKRY

ID for Cyan ink bottles:

XXX-996-B96-BBUC
DV9-E8U-JW4-K47Z
WQ3-8ZR-M6Z-Z96F
MAY-M8D-8LZ-VUXC
VKP-V8T-87L-PGWB
LHL-K58-D3H-GV25
vbm - L3q - 4wp - v2te
Y2A - VBR - QBZ - XD3Q
H2X - 4UX - 7X9 - 4KCP
B84 - RUA - MM7 - UY85
JSL - 5PU - 5HL - QQBF
CL4 - CQB - HUG - Y53P
A92 - Y6J - YTM - 55VZ
DY5 - 744 - DTS - CR4A
J44 - 5LP - 2QL - WCWP
B94 - MK2 - UXJ - 2BGE
4ND - YSC - M3G - VGNC
NCW - 9EA - GCM - 7XMN
UQG - BCE - 7VQ - YGZY

ID for Magenta ink bottles:

LV5-BJ8-W26-GSJS
SYH-LYR-7RR-L8EF
MWA-MUJ-W6K-YJDY
HXB-ES6-5TD-UKRP
BJ2-HB4-8QP-GKPQ
4XP-YJ7-N7Z-6X63
VKT - 3N8 - K3S - EDQR
LDR - 2EA - 6KL - 4KCP
K5X - AW3 - VDU - X8GN
FEA - 8Q8 - UZM - B7U5
FXL - LFM - XAY - LUR3
9A2 - E8J - BH9 - 8D6Z
F7B - 339 -ED2 - J4UA
X4H - PNM - 2V5 - DGNZ
22L - AML - DVU - 9RK9
72W - J3K - 4BE - L7KG
EG2 - JSH - 6HY - KBX5
CEA - 393 - CPQ - 2URE
Y9M - T7N - W4B - H9UM

ID For Yellow ink bottles:

RXU-7VR-XK7-P7JZ
FX2-6XP-PGL-LTFP
K33-RG2-YRN-XACJ
QGM-5Z8-6UC-UWBQ
B5W-AZ8-F82-QADY
G4A-9VQ-A8Q-2EFZ
DN4 - 5BE - S26 - NMY5
ALQ - W9G - 92W - YDMN
PPZ - FTN - 6TL - D8EZ
QDB - L3C - 5NU - TP5G
VPT - 36F - A3E - KW7E
QGD - P7Q - PLX - CNUZ
7XG - B4Q - QFZ - XCJG
HM9 - JVZ - LQ3 -H4BA
5G3 - VR3 - HPU - 6XDZ
77X - 5CP - 527 - H4JZ
ADE - BRE - Z8S - JR6J
34R - 6Y3 - PBK - E8BG
62L - 9E4 - L76 - RHYG

Restoring codes for Epson L800 6 color printer:

ID for Black ink bottles:

QJK-8M3-8SK-WE7N
TQY-9DL-2WA-98EA
L5H-8YL-MGG-2CDJ
QTX-WHE-R6L-DTBM
TUP-AB9-KPS-MZX5
32X-FDB-UUT-26UC
ULL-WCZ-M7L-4PAR
75B-TB3-FAQ-JP73
NAK-F6A-ZAS-CKBA
QMT-F6L-AQ3-JQRA
LQ5-GTQ-R3P-DNRE

ID for Cyan ink bottles:

64S-GB8-D68-PEPB
A7R-VLM-LRA-X583
QWU-ZXZ-RVP-V7HZ
8LL-JEM-CD2-957F
JCK-WBR-J3D-PRGB
8SL-W74-UTP-QV8C
BZ4-YV2-8NS-XKPN
PKP-D6W-X6T-QPTE
37W-336-DX7-EKDY
WBA-5G5-ZJW-BTAN

ID for Light Cyan ink bottles:

TJT-2EQ-F9H-T97C
327-6WX-BN3-CFHS
SFL-J2G-RH2-857M
2PH-3MX-PXP-AVQ3
JSL-VJ3-LA2-C385
VCC-TAK-BGE-ATB3
U6Z-JFU-SS9-3X9B
N8L-WLQ-T2E-X98R
DDM-T5C-V34-5EWA

ID for Magenta ink bottles:

3BJ-VEF-RV7-J8AE
F68-2JE-E6T-BQ6N
RVR-9Z4-CA7-ZUDR
NQ8-TFS-Q34-J4RC
J9D-REA-BSM-CTYC
XD7-Z73-3NQ-UZPN
RUG-WCP-H55-7CDA
WEQ-7DM-T8X-9MCZ
2BC-4DV-Z7L-2VXN
2NA-VTV-NKV-MSWE

ID for Light Magenta ink bottles:

XKK-3TP-UU4-XE85
Z5Z- C5Q-Q6F-APZF
9F8-QEC-RDD-85TF
3PC-X3S-R89-LXZN
WEZ-6ES-WDA-C6PG
7WG-UKZ-9YK-J6ZN
NFT-WV9-ZZ9-6DMZ
LLW-HGE-6WG-WWPC
W4V-YY7-7MB-PGFF

ID for Yellow ink bottles:

UTV-GPF-2H3-BFW5
C9K-88G-JUQ-HGYM
FB7-Q2N-APU-XQ4E
SF8-WBQ-LH7-S5TF
BSY-YV3-Q65-KM9J
NL7-DRB-8Q5-W94R GCS-ZFE-7ZY-8RQJ
742-HR5-UE3-9D6P
UHN-PJ8-U8V-CHBR
9J9-9V8-AHU-MDDN

lunes, 18 de marzo de 2013

How to refill Canon 211 and 211XL ink cartridges

 As we all know, these are some great ink cartridges, that are known for their high page yield and overall functioning.

Canon 211 and 211XL cartridges are the most widely used ink cartridge model in Continuous Ink Systems (CISS), which have become rather popular in current times.

This particular ink cartridge’s quality lies on its high page yield and, like most good things in life, they tend to be a bit pricey. This condition has led us to refill them, so we can save some money and keep moving forward.

Here are the instructions to refill your Canon 211 and 211XL ink cartridges:

1. First of all, place the ink cartridge on a surface that can take one or more ink spills. This particular ink cartridge, due to its manufacturing, won’t let any ink leave the carcass, but we recommend you do this anyway.

2. Remove the label on top the ink cartridge to find three (3) small orifices. They’ll look too small to fit an ink-filled syringe, but you’ll be able to do it anyway. If you can’t do it, we recommend you use a small drilling device to widen these holes just a bit.
ink cartridge 211 tricolor refill
ink cartridge 211 tricolor
3. You must inject 5ml of ink into every one of these holes. Be very careful about the color placing, since mixing the colors up can damage the ink cartridge.

4. Remember to fill the ink cartridge very slowly with the colored ink. Try to put the label back on it while leaving some space for the air to flow inside the ink cartridge. Place the ink cartridge back in the printer and leave it there for about eight (8) hours so the sponges become soaked with ink.

Articles related to this one:
1. How to refill Canon 210 and 210XL ink cartridges
2. How to reset Canon 210 and 211 ink cartridges

domingo, 3 de febrero de 2013

Make HP Officejet 6500 printers recognize its ink cartridges

We usually have problems with HP Officejet 6500 printers, since they refuse to recognize the ink cartridges we’ve placed inside them, whether they’re brand new, recycled or refilled.
printer hp 6500
printer hp 6500
We even considered the print heads were damaged, but this was a mistake: the problem persisted after these parts were replaced.

Replacing an entire HP Officejet 6500 headprint will cost you $45,00, a considerable amount to pay to replace an article that’s in perfect shape.

We’ve done quite a bit of research and have come to realize this problem is caused by a small sensor. This sensor is located on the left side of the mechanism that makes the ink cartridges move from one side to the other throughout the entire printing process.

Procedure to eradicate ink cartridge recognition issues on HP Officejet 6500 printers:

Step #1:
This procedure will help you clean your HP Officejet 6500 printer’s sensor, which is not recognizing the ink cartridges. We must press our printer’s On/Off button, located on the front side of the panel. The On/off button looks like this.

Step #2:
Open the gate leading to the ink cartridges. This will imply raising everything, the scanner included, to take a good look at the ink cartridges. Wait for them to reach the center of the printer and leaving the left side free.

Step #3:
Locate the sensor on the lower-left side of the ink cartridges; it will look like a small square. You must clean this section very carefully using a small piece of fabric to get the printer to recognize the ink cartridges.

Step #4:
Close your HP Officejet 6500 printer’s gate and wait for the ink cartridges to get back to their proper spot. You can now  print a test sheet.

Please verify the printer has properly recognized each ink cartridge. In case this doesn’t happen, you can contact us by leaving a comment in the section below this post.

jueves, 31 de enero de 2013

Resetting the chips on Sharp AL-2021/AL-2031/AL-2041 copiers

Dear readers, this question has been all over the Internet recently, and I’ve also wanted to know the answer to it in the past. The Internet is also responsible for helping us techs out, who must solve many problems in our workshops.

As it turns out, Sharp has stopped standing out for us and is now focused on selling more and more printers. It seems they’re only interested in getting us to buy the latest product and throwing them out as soon as a new one comes along.
reset sharp toner chip
reset tóner chip for sharp
Sharp AI-1000 toners used to be used in Sharp AI-2040 printers, for example. These toners in particular are known for their resistance, and they yield  much more than any other toner, whether it’s a new or refilled one.Nowadays, this toner has been replaced by the sought-after AL-204TD, a very hard toner to use. If you have one at hand, you can make sure we’re talking about the same toner.

This toner is renowned among us techs nowadays, and the main question lies in how to restore them and get them to stop saying they’re empty after they’ve ran out; buying a new toner off the bat is not an easy thing to do. The main problem here is the printer refuses to continue printing, a problem caused by none other than the chip you can see in this next picture.
toner cartridge for sharp al-2031

This very chip shown in the picture can be a bit hard to restore, and we can’t offer a solution for this situation right now. If you, reader, happen to know of a solution to this particular issue, we’d be very grateful if you put it in a comment in the section below this post so we could publish it on the blog.

However, not all is lost. Remember why I keep recommending you install a page counter program on your computer? Here’s the reason why.

Installing this piece of software is one of the best things we can do; one of its main advantages is learning when our toner or ink cartridge is about to run out. Like we said, there’s still hope, and this is the one loophole Sharp completely forgot about.

If toner runs out in these printers and you choose to refill them, we regret to inform you the printer will always say the cartridges are empty and you will need to buy an entirely new chip to fix this problem. We happen to have these in stock in our online shop, so look for them, order the exact amount you need and check our shipping and delivery options. In our store tinta.com.do, we offer them to you at the best price in the entire American continent, and can even provide a tracking number so you always know your order’s exact location.

Another thing you can do is to avoid letting the toner dust run out completely. If you already know how long it takes for this to happen, just refill it before the toner’s empty. You’ll then be using this same toner until the toner developer is depleted. This is exactly why we recommend you install a page counter.

Note: This post has been created by us using information we’ve compiled in our workshop, where we’ve fixed this problem multiple times. We certainly appreciate any comment you may have, and are aware this is not the only piece of information regarding this subject. If you know of any other fix to this issue, please post it in the section below.

viernes, 25 de enero de 2013

The ink cartridge carriage is stuck

When our printers show this stuck carriage problem or we’re able to see they’re not moving properly from one side to the other, maybe even notice some sort of obstacle in the way, we recommend you follow this secure procedure.

First of all, you must turn the printer off and unplug the power cord, as well as any other cable that is attached to it at the moment.

You must now check the printer by opening the ink cartridge gate:

If you’re able to detect any foreign object that’s in the way of the carriage, remove it from the printer as delicately as possible. You can then turn the printer back on and check the cartridge carriages are moving freely, and that no error message appears on the printer’s screen.

If the problem persists, continue to open a new gate located in the back of your printer, as is shown in the picture.
open door
open door
This will help you see any paper sheet or part of it that’s compromising your printer’s proper functioning. Remove this piece of paper delicately to harming the printer, and put the lid back where you took it from.

Please check your printer’s functioning once more

If you haven’t been able to solve this problem, you must also know improper cartridge placement could also be the cause. You can then proceed to remove them slowly; please visit the printer's manufacturer website or check the instructions manual for the correct placing of the cartridges. Follow the steps indicated, check as many times as you must and print a test sheet you rid yourself of doubt.


Once this has been fixed, you must remember its exact cause and keep it from happening again; this will save you bigger issues in the future. If none of these suggestions helped you, please reach out to a professional, since this minor issue could be due to more serious problems.

jueves, 24 de enero de 2013

How to reset normal // XLS #920 HP ink cartridges

“The following ink cartridge appears to be missing or damaged.”

This is the message that torments us when we refill #920 and #920XL cartridges.


Here is the solution:

So far, we do not know of any method that works 100% of the time on this type of cartridge when it comes to resetting them without changing the chip. As you already know, occasionally the chip alone often costs half as much as a new ink cartridge.

Until now, we have been proving, unofficially, a great way of resetting these cartridges. We’d have to keep looking for solutions, as you also should. If you have another one, please comment on this post in order to help everyone out.


Tutorial:

  • We recommend you remove the head print and the ink cartridges from your printer before getting this process started. You will have to clean the cartridges delicately with toilet paper or paper napkins, considering their sensibility.
  • First, we restore the printer entirely. When these cartridges cause problems, they stop reacting to any key or button that can be pressed. This product’s evolution is only fair for the sellers.
  • In order to restore the printer, we must disconnect it for about twenty (20) seconds. “The printer must be on when we disconnect it.”
  • The printer must be disconnected for at least twenty (20) seconds, “but we’d it prefer if you left a few more seconds pass.”
  • Before reconnecting the printer,  we must press the keys corresponding to number three (3) and the pound or hashtag key (#).
  • Now that we’ve connected the printer, we’ll have to wait while keeping both keys pressed down, until the printer sends the same error message again: “The following ink cartridge appears to be missing or damaged.” The damaged ink cartridges’ names will appear.
  • After this entire process is done, we can start discarding the ink cartridges that are effectively damaged. What you must do is open the printer, remove the cartridge the printer is pointing out as damaged and put it back in. If this happens with another cartridge or the rest of them, you must do the same with each and every one of them until they’re all working properly.

This can happen more than once on the same ink cartridge, and that’s fine. You only need to remove the cartridge and repeat the process once more.

“Note: the ink cartridges will not show the amount of remaining ink again, but they will print perfectly and without problems. The printer will no longer recognize the amount of ink. In case you want this amount to be displayed, we recommend you change the chip for a new one.”

My printer pulls more than one paper sheet at a time

This may happen when printers are a bit old and their parts have been worn out due to daily use. This daily use, added to the passing of time, could possibly cause printing problems.

To this day, this problem keeps appearing, and the only radical and definite solution involves changing some of the printer’s parts. We, however, use an alternative that works all the time, and it consists of loading the printer up with many paper sheets.

When we talk about many sheets, we’re not talking about loading it up so it cannot work, but only to fill it up with the adequate amount so it doesn’t compromise or force its functioning.

We recommend you take good care of your printer and pay a lot of attention to paper jams, since they can damage its internal parts. Take even better care of it if it’s an older model, since those are the best ones out there; it has been proven to be so.

If you know of any other solution for this problem, please comment on this post. If you have another question related to this issue, you may use our own group and send us a personalized question. We will do our best to answer it.

I’m putting my refilled cartridges back in the printer and the On/Off button keeps blinking

This post deals with a frequent issue that appears when we refill cartridges, put them back in the printers and the On/Off button blinks.

This is a very common scenario and, regrettably, bad news. This happening means the printer has stopped recognizing the cartridges, and that only happens when the ink cartridge is damaged.

But the truth is that, if the On/Off button blinks, either the print cartridge contacts or the printer connectors are dirty.
ink conector hp printer
ink conector printer hp

Here we have the print cartridge connectors. Remember to clean them with wet toilet paper, preferably.
hp 22 tricolor conector
ink cartridge conector hp

Cleaning the printer or the print cartridge connectors:

  1. The solution to this small problem with the dirty connectors is to clean them, whether they’re the printer connectors or the print cartridge ones. We recommend you clean them with wet paper napkins or toilet paper. With this, all you’re doing is allowing the contacts to finish their own work, and the ink cartridges to finish the pending process of transmitting the heat from the printer towards them.

In case this first process doesn’t work:

  1. Unfortunately, there is no alternate solution in this case. It seems the ink cartridge has been completely worn out. The only possible fix is replacing the damaged cartridge for another one, whether you use a new one or a used cartridge. This damage occurs when the ink cartridges aren’t able to heat the glycerin in the ink in order to make it expand throughout the sheet of paper. When the printer starts heating the head prints up and the ink cartridges are empty, the heat burns them and the circuits are damaged in the process. This is what causes the On/Off button to blink.
If you have any other solution to this problem, please put it in a comment down below. The fact that this post has already been made doesn’t mean that it’s the best way of performing this operation: our intention lies on sharing. If you know of any other way of doing this, please present it, we agree with sharing and solving. If you have any question similar to this one or a more complex one, please make it in our group.

Page yield, or how many pages you can print out of your ink cartridges

This is a very hot topic, talked about and searched for all over the media. It’s also very important that you can count on a tool similar than the one Hewlett-Packard has created for us, since it will help you identify how many pages you can print with your ink cartridges.

However, it can do much more than this. It can also help you know how much ink to refill your ink cartridges with, which is not an easy task to execute unless you have the original packaging. This little box is the only place where you can obtain this information and avoid clogging your ink heads. Also, adding more than the necessary volume can compromise proper functioning.
For example, color ink cartridges tend to print poorly, especially when the Yellow and Magenta color are mixed together. In this case, we need the exact amount of ink for printing, not less or more, but just the quantity indicated in the packaging. You can also check this out in the Hewlett-Packard website, but it’s too big a site to browse.

There’s one section out of the entire website that can help you find page yield information about your ink cartridge. It’s called HP SureSupply.
hp sure supply
hp sure supply for hp
You will find all the information you need about ink cartridge yield right where it’s indicated in the picture. We recommend you type everything from the printer type to the model; you could also add the ink cartridge number, but that search could give out many more results than needed.

For example, we’ve already typed in our printer model. You can now see the results we got using this system: the #27 ink cartridge will show up, along with all the information regarding the amount of ink it works with.
information about the ink cartridges hp
ink cartridge hp
As you can see, the amount of ink needed for the #27 Black ink cartridge has shown up. There is, however, a logical way for us to come to the conclusion that the #28 Tricolor ink cartridge uses the same amount of ink as the #27 one. As we know, the #27 ink cartridge uses 10ml and prints about 280 pages with 5% ave, as indicated in the search result. This same ave percentage lets us know the #28 ink cartridge uses the same amount of ink as the #27 one, even when the total is distributed between its three orifices.

---
Please remember the information supplied by this blog is meant to be shared. We appreciate every comment and additional solutions we can receive regarding this issue. If you have a more personalized question, you can post it in our group called “You have a question, we have an answer.” Thank you very much for visiting our blog, and please comment!

martes, 22 de enero de 2013

How to refill Canon 210 and 210XL ink cartridges

This post will teach you how to refill your own Canon 210 and 210XL ink cartridges and make them last even longer.

It’s a known fact that these ink cartridges have lasted the longest in Canon printers, and have also been chosen by two printer generations: the PIXMA and MP series. In all honesty, they are great ink cartridges with high print quality, which I believe has a lot to do with the fact that they’re manufactured in Japan.

Japan’s a country we’ve all come to know for their product quality, a factor that could be related to the very elevated prices these ink cartridges run for. This has led many people to consider refilling their Canon 210 and 210XL ink cartridges.

Further down below, you will find every instruction you must follow in order to refill these ink cartridges, and several suggestions just in case any inconvenience should arise after the refill process has been completed.

Instructions to refill Canon 210 and 210XL Black ink cartridges:

1. The most important thing you must do before refilling an ink cartridge is placing it on a surface that can take an ink spill.

However, due to their high manufacturing quality,  these ink cartridges don’t seem capable of causing an ink spill: the ink cannot escape the cartridge even if it has been overfilled. We do recommend you place it on a napkin or piece of cloth, preferably a black one.
2. Remove the upper label on every single ink cartridge. We do recommend you take it off completely rather than leaving it one, as many other people do. By moving them in this manner, we gain control over the ink cartridge and can leave it exactly as it was when it left the factory.
black ink cartridge canon 210
canon black 210
3. Now you must look out for a small orifice that will allow air to enter the ink cartridge and contribute to the printing process. We suggest you introduce the syringe’s needle through this same hole; if this is not possible, try piercing it. However, we’d prefer it if you didn’t drill it unless absolutely necessary. This is what drilling looks like.
drilling ink cartridge canon
drilling ink cartridge
4. Fill the syringe up with 15ml of ink, the proper amount of ink you will need to inject into the ink cartridge. Please keep in mind this is all the ink you’re supposed to use, and that adding more than this is completely unnecessary.

To find out the exact amount of ink your ink cartridge uses, take a look at our post Page yield, or how many pages you can print out of your ink cartridges.

5. Very slowly, inject the entire amount of ink through the orifice. This ink cartridge may start releasing a bit of ink from the bottom, near the ink head. It’s okay if this happens, it’s perfectly normal and you don’t need to be surprised if it actually happens. This is why we suggested you kept a napkin or piece of cloth around.
ink for the cartridge
ink for canon pg-210 cartridge
6. You can now place the labels back on the ink cartridges, trying to put them exactly as they were before. We recommend you have the printer execute a cleaning process by printing test sheets, just to make sure everything’s working out properly. 

We also suggest you leave the ink cartridge inside the printer for about 8 hours, allowing the ink to flow through and saturate the entire printer.

7. After refilling this kind of ink cartridge, the printer may need to be restored every single time they’re removed from it. In this case, we suggest you reset them.Right now we’re working with a restoring procedure that may not suit your actual printer model, but that is compatible with your ink cartridge type:


If you have any other question, please post a comment in the section below this post. We will answer your every inquiry as soon as possible.

What is the best HP Multifunction printer of 2012

What could be the best HP Multifunction printer of 2012? Read this post to find out our choice and the reasons behind it.

Dear readers, here you will find the answer to your question., one that I see is posted on this blog every single day. We’re all obviously very interested in knowing what the best printer is to fulfill our daily needs. This device shouldn’t get damaged right away and help us save money in ink cartridges or toner, whichever our case may be. As we’ve said in previous posts, what really matters is the ink cartridges, not the printer itself.

Most printers are basically the same device and work almost the same as one another. If, for example, you try to judge them based on page yield, you will see the HP Deskjet 100 printers is one of the worst ones in the market. However, you install the HP 122 Black or Tricolor ink cartridges on this same printer model and change the inner sponge so they can hold up to 10ml of ink, the printer itself will become a hit.

This ink cartridge will amp up this printer’s page yield and it to the top of the list, meaning the ink cartridge is much more important than the actual device when it comes to making a good one. The actual print quality and page yield depend on them.

However, since we’re currently looking for the best multifunctional printer of 2012, we must know it will need to have good ink cartridges. Therefore, I present you the ink cartridges that fulfill these expectations:
  • Best Epson Inkjet printer of 2013
  • Best HP Laserjet printer of 2013
HP 920XL Black / Magenta / Yellow / Cyan ink cartridges.
For example, this Black ink cartridge can print up to 1,200 pages, a very decent amount considering this is one of the older ones. If you wish you compare its page yield with some of its partners’, we recommend you take a look at both the links added before.
920 hp new in box
920 ink cartridges

  • You may be interested in learning how to restore HP 920 ink cartridges.
  • You may also wish to read on about cleaning the headprints on HP printers that work with this ink cartridge in particular.
Now all we must do is find out which is the best MF printer, for which we’ll need to search printer models compatible with the ink cartridges shown ahead. These printers will obviously be very good, but the ink cartridges will make them yield much more than before.

One of the award-winning printers if:
HP Officejet 6500 series printers.

The information supplied on this post is based on free pieces of advice we give our customers. It’s not a rule, but only experiences we’ve acquired from our work environment. If you know of any other answer to this same question, please post it in a comment.

sábado, 19 de enero de 2013

How to refill Canon 211 and 211XL cartridges

These are very good ink cartridges especially for their performance and easy functionality. These cartridges are the most used for printers with continuos ink system which have become famous for their easy installations in Canon printers. Therefore, making these cartridges very attractive for Canon printers ' owners. These cartridges are the best of the best due to their high quality and well built structure. But, they are also expensive which force most of Canon's printer users to refill these cartridges to save money in the long run.

Instructions on how to refill Canon 211 and 211XL Cartridges:  

  1. Place the cartridge on a black piece of cloth or a napkin in case the cartridge drains ink.
  2. Next, remove the label from the cartridge surface to reveal three holes. Drill one of the holes big enough to insert the syringe fill with ink (first image). 
  3. You will see three holes on the cartridge. Inject 5ml of ink in each hole. Make sure to inject the ink in the corresponding order otherwise, the cartridge could get damage (second image). 
  4. Refill the cartridge SLOWLY to avoid any spill ink. Place the label back on the cartridge to seal the holes. We recommend to return the cartridge to the printer and leave it for about 8 hours to allow the ink to saturate the sponges. 
Canon 211XL cartridge
Ink insertion point

Corresponding color point of entry
Corresponding color holes

Related articles:

  • How to refill Canon 210 and 210 XL
  • How to refill Canon 210 and 211

jueves, 17 de enero de 2013

How to clean ink cartridges

One of the main reasons we chose to refill our ink cartridges is for the high cost of these ink cartridges. It is hard to understand why would an ink cartridge cost so much when is so cheap to manufacture. But, it doesn't matter, things are the way they are today and is up to us as consumers to max out our ink cartridges by refilling them as many times as possible and by taking good care them. 
To ensure the maximum durability of an ink cartridge, the cartridge must be in optimal conditions by cleaning it well, knowing when to refill it, and when to apply the right amount of ink among other key factors. 
Through this post we will learn step by step, the most effective way to clean an ink cartridge so it can increase its performance and longevity saving us money on ink and helping us to keep our printer a while longer. 
To start off, we will need some ingredients that can be found in our household. Please, bare in mind, this post is not about how to open an ink cartridge, but how to clean it. The steps shown in this post can be applied when the ink cartridge is fill with ink's residue or when the light on the printer is flickering; indicating that the connectors need to be clean soon; and finally, when the printer is printing blurry.
We'll need:
  • Warm water
  • A piece of smooth cloth or napkin
  • Small cotton swab (not necessarily mandatory)
  • Print head connectors
    Printer's connectors

Instructions on how to clean an ink cartridge:

Step 1.
Before anything, we must identify what type of ink cartridge we are dealing with so we may know if they have print heads or not. Some cartridges have the print heads inside the cartridge itself, others have the print heads separate from the cartridges. Just in case you are not sure where exactly your cartridge's print head is, consult your owner's printer manual or the printer's manufacturer support web page. Therefore, to help you find out where your cartridge's print head is and which part needs to be clean.

Step 2.
Before we begin, it is recommended that we perform a print head cleaning that comes with the printer by default. The instructions related to this procedure can be found in the printer's owner manual or on the web. Moreover, you can find more information on the front side of most printers.
After confirming that the print head has been cleaned using the default tool, but you still do not see any changes in printing quality; we recommend to turn off the printer. Once the printer is off, open the printer's cover to access the cartridge. When the cartridge holder stops in the middle of rail, proceed to remove the cartridge from the cartridge's holder so you may be able to clean the connectors on the cartridge's holder.

Step 3.
Now we will clean the cartridges or the the print heads by submerging them into warm water. Remember, the water must be warm; but not too hot to avoid damaging the print head's plastic attachment. It has been proven that using warm water to clean off any ink residue from the ink cartridge is the best method so far, please be careful not to heat the water too much. 

Step 4.
Our next step is to remove the cartridges from the warm water and clean the print head with a soft piece of cloth or a very smooth napkin which can be dispose off after each use. Please bare in mind that if the cartridge has some left over ink, it may damage any part we may need in the near future. We need to clean the both the cartridges and print heads' connectors carefully in case they are dirty so everything may work well.
If the print head is inside the printer, we may remove the print heads to have them cleaned, but making sure that he print heads ' connectors are not dirty; if they are, clean them. Be very careful not to touch the print head's connectors with your fingertips when you are cleaning them because any foreign particle that comes in contact with the connectors could make printing impossible.

Step 5.
Finally, make sure the cartridges are clean so we can print several test pages to compare the printing quality after the cleaning process the cartridges and print heads went through. The test can be done from either the printer's control panel or from the desktop.
If you can't clean your cartridges or your cartridges print heads, please leave us a comment on our comment area and we will be happy to help you. Thank you for your visit and we hope to see again.